Search This Blog

Saturday, December 12, 2015

Rustic Picture Clipboards


Once I saw the post by Love Grows Wild with the DIY PhotoClipboards, I knew I had to have them. 
    
                                                            Learn how to make these gorgeous DIY Photo Clipboards at LoveGrowswild.com:
I had the perfect place for them – the beadboard wall in the kitchen had a small shelf begging for adornment, as seen here in the listing photos.   

Photography credit: Jaime Gervasi & Associates of Long & Foster Real Estate

I always strive to add accessories that are both functional and beautiful, especially so that my boyfriend cannot veto them or dismiss them.  (My one weakness is pillows; however, his cats love my pillows and lay all over them so the boyfriend is outnumbered on this one.)

I bought one board (60 inches long, 12 inches wide, 1 inch thick) from Home Depot and had them cut it into 5 pieces, each measuring about 12 inches.  I then sanded the corners and stained them, using the same Miniwax Dark Walnut stain I used for the “DIYWooden Desk Top” post.  I liked how the stain looked after one coat – the wood seems to really just soak it up like water.  I then added the same Miniwax Low Gloss Finishing Stain that I also used on the desk.  

Here are some pictures of the boards in varying stages of the process:


I then glued on these clips, purchased on Amazon.  I really really wanted to purchase the pictures from Love Grows Wild, as they are beautiful and I know I do not have that skill level yet.  Recently, the boyfriend and I have been experimenting with Blue Apron.  He loves it, and I love anything that inspires him to cook and allows me to eat.  :)   Seriously, I think he cooked 3 meals the other week.  My quality of life is just going up and up and up!  We have been keeping the recipes we like with plans to reproduce them on our own.  I took a few of our favorite recipes and put them on the clipboards, with the hope that seeing these yummy meals would inspire a trip to the grocery store.  

Here is the finished product:


Spray Painting Glass Vases


Hi everyone,

I know I haven’t posted in a while, but I had a busy few weeks of medical boards (I passed!), grant applications, and time on service.  There have been no shortage of new house projects in the interim, but I haven’t had the time to post anything until now.

We have been busy trying to put the finishing touches on different rooms.  In our old house, the living room color scheme was green and yellow, which was the color scheme in my previous apartment as well.  The boyfriend liked it, but I was ready for a change.  We decided on a scheme of blue, gray, and white for the living room.  I prefer neutral walls and furniture with pops of color in the accessories (rugs, vases, pillows, etc.) so that I can reuse the larger and more expensive pieces and replace the smaller objects over time.

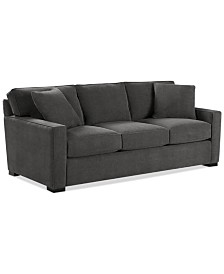
We were able to find a great grey couch on sale at Macy’s and an appropriately sized and priced blue rug at Target that we both agreed on.  I had a blue color scheme in the guest bedroom of our last house and my previous apartment, so I decided to use the same pillows in the living room.  The boyfriend felt that they were more of a “teal” color, but I disagreed.  We reused my tv stand (Value City Furniture) and book shelf (World Market) purchased years ago.
Radley Fabric Sofa
Radley Fabric Sofa - www.macys.com


We are still working on the wall décor.  We found a really nice clock on Amazon that seemed to fit with our plans.  I also found a Groupon for canvas photos and decided to immortalize the cats on the wall.  The boyfriend, for the record, vehemently disagreed with this plan, as he felt it made him look like a “crazy cat man” so I take full responsibility.  I had several great photos of Rey, who is very picturesque.  Unfortunately Bob and Nonna are terrified of me so their photo sessions were less than ideal.  These are the same pictures used in my “Who am I?” post, now immortalized forever on canvas prints.  We hope to add to the wall over time with other interesting finds.

Next, I needed to reuse my now obsolete beautiful green and yellow accessories in the new house.  I got these tall green vases at Home Goods a few years ago and they have served me well.  I couldn’t reuse them in other areas of the house, so I decided to spray paint them white.  I looked at a few tutorials on Pinterest, and this one by LiveLoveDIY seemed the most applicable to my situation.

                                                             10 Paint Secrets: what you never knew about paint (like how to spray paint glass!). This is GREAT!:

First I washed and dried the vases to remove dust and grime.  I then used the same spray paint as the blog referenced above, Rust-Oleum High Gloss White.  I let the vases dry for a day and then moved them upstairs next to the TV, where they previously lived.  I also spray painted a smaller vase blue using Krylon Ocean Blue to add some variation to the color scheme.   

Here are the original vases:


Here is the finished product:


I absolutely love how they look!