Hi everyone,
I hope your holidays were filled with food, fun, and family. We hosted the in-laws for a weekend in the new townhouse. It was a packed house with 14 people (we rented a nearby Air BnB for some extra sleeping room). The large eat in kitchen was the key to hosting successfully as we have added a few things since moving in to increase storage and seating options there. Today I want to highlight one of the projects from the kitchen, our new kitchen island.

The house came with a large butcher block island but it was simply not enough storage for all of our kitchen things, particularly gifts from our wedding last year. I knew we would have to add an island and wanted something that looked more like a piece of furniture, similar to the island in our old house. I did my usual perusals of Craigslist and Nextdoor and stumbled upon this beauty. I was able to meet the seller close to the new house and then manuevered it into the new place all by myself. Well ok, I manuevered it into the new house just enough to close the door and then waited for the hubs to help me get it up the steps and into the kitchen.
This
island sells on Amazon for around $400 but I got it used for $100. We did not need the wine storage but the cubbies were still useful as well as the drawers. It wasn't the right color so...I painted it. Several times actually. I started with
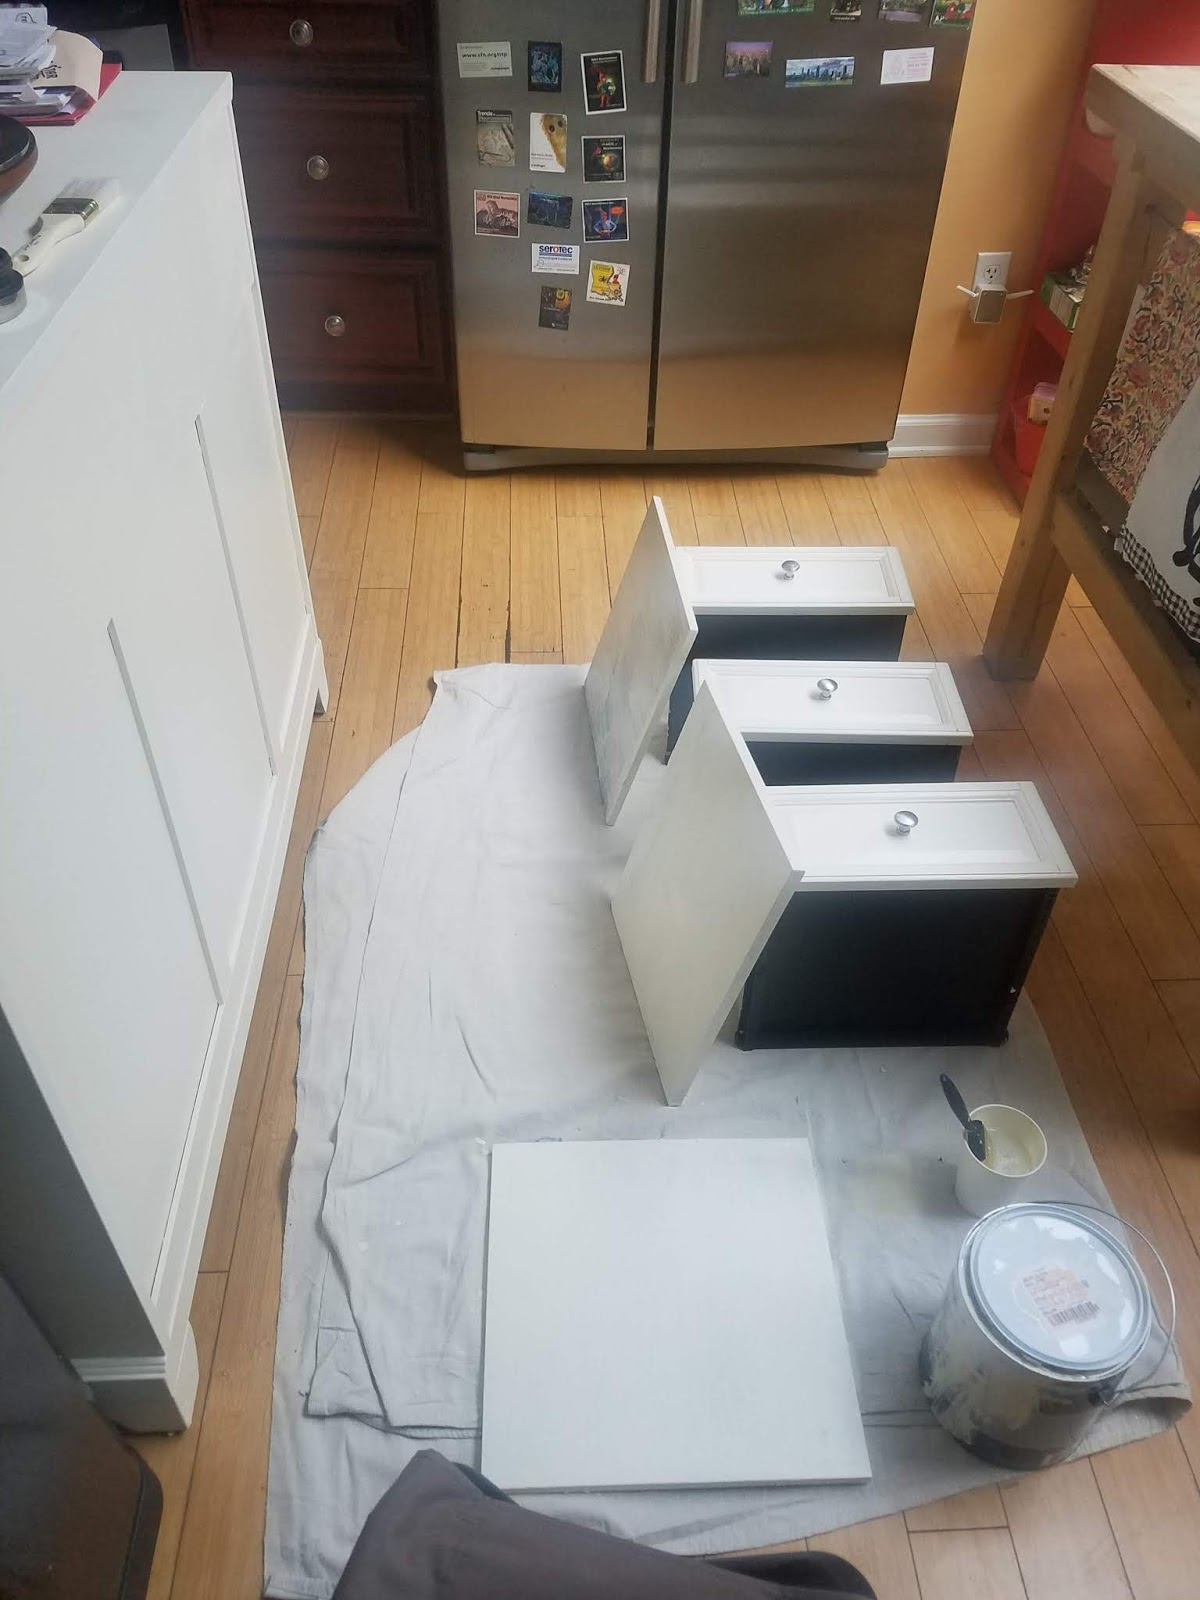
Heirloom White Rust-Oleum spray paint but it wasn't providing enough coverage, so I matched the spray paint to traditional paint and at Home Depot and went after it again. Every single nook and cranny. I am really considering hiring out furniture painting in the future to have it professionally sprayed and finished, at least for heavy use furniture. It was exhausting and I already need to do some touch up paint and another finish coat. Still, it looks good.
See the splotchy coverage of the spray paint. I thought it would go away after a few more coats, but it just got worse.
After one coat of traditional paint, the island looked...almost finished. I still did two more coats to be safe, but...much better.
Next it was time to source a countertop. I thought a wood top would be best in the kitchen, but the new large thick butcher block tops were just a little too expensive. Cue $20 Craigslist find - large solid wood coffee table with thick wood top. A whole lot of sanding later (which the hubs helped with), we had our island countertop.
First we had to sand off the shiny finish.
Then we had to sand off the stain.
We did a quick dry fit and the wood top was ALMOST perfect. The size was exactly right, but it had a little bowing so we put it under a makeshift tent with the humidifier which flattened it out a little. It's still not exact, but...it has character.
On to staining. I tested out a bunch of stains on the bottom of the island and was unhappy with most of the options. I tried my usual go to
Miniwax dark walnut stain. The wood has some reddish parts to it which did not look good with the first coat of walnut stain. The second coat was more even but it was so dark it obscured the grain and really made the top look similar to its original coffee table finish. Back to the drawing board.
Next, I decided to try to even out the reddish tones using a
Miniwax white stain, a new option I picked up on sale at Home Depot. I started out with some very light coats and it seemed to be work. The below pictures show the change over time as the white stain evens out the color variation in the different wood tones in the island, giving it a nice even look.
BEAUTIFUL. We attached it with clear gorilla glue and put some heavy items on it to weight down during the drying process. On to sealing.
I read a LOT of blogs about sealing options before making a decision. I had originally wanted something food safe but
tung oil was changing the color of my stain in an unappealing way and the smell was horrendous. After reading more blogs and web posts, I decide to try some
wipe on poly. Three layers later, it really wasn't enough to hold up to day to day use of the island. Wet dishes put on the island to dry left rings. Sigh. After a light sanding, I put on three coats of
polycrylic while the hubs watched. This stuff had only a slight smell, went on super easy, and really finished off the island perfectly.
After a brief break to let it cure, we had a fully functioning kitchen island with storage and a thick wood top. The cabinets hold our bowls and trashbags, the cubbies hold foils, plastic bags, tupperware, and the drawers hold our oven mitts, appliance manuals, and bottle openers. On top is my red bowl and the fancy cheese board my bosses got us as a wedding gift. This project was finished in August 2018, right before my father and brother came to visit. It has held up nicely over the last few months - like I said, we use it pretty much daily so there's some slight wear on the edges of the door and island and it will need to be sanded and resealed again due to the early mistakes with the finish, but oooooohh!
Look how good the wood grain looks under than white stain! Look how thick it is! Look how it looks under the light from the skylight! I think for the first month, the hubs and I would just touch it and let out little sighs of satisfaction.
I want you to ignore all the sneak peeks of the kitchen you're getting. Wait for my kitchen post. WAIT.