Search This Blog

Wednesday, June 30, 2021

Multi-purpose Guest Room


Hi All,

We've had our first overnight guests in the Baltimore house!

It was the hubby's parents.  We haven't seen them since the 2019 winter holidays.

We hosted them for a lovely long weekend here.  The weather was the PITS but we had plenty of space in the new house to stretch out, play games, and most importantly, eat and sleep.  

It is always motivating to me to have guests.  They make me finish projects that are 90% there - the guest room was one of those spaces.

The Beginning:

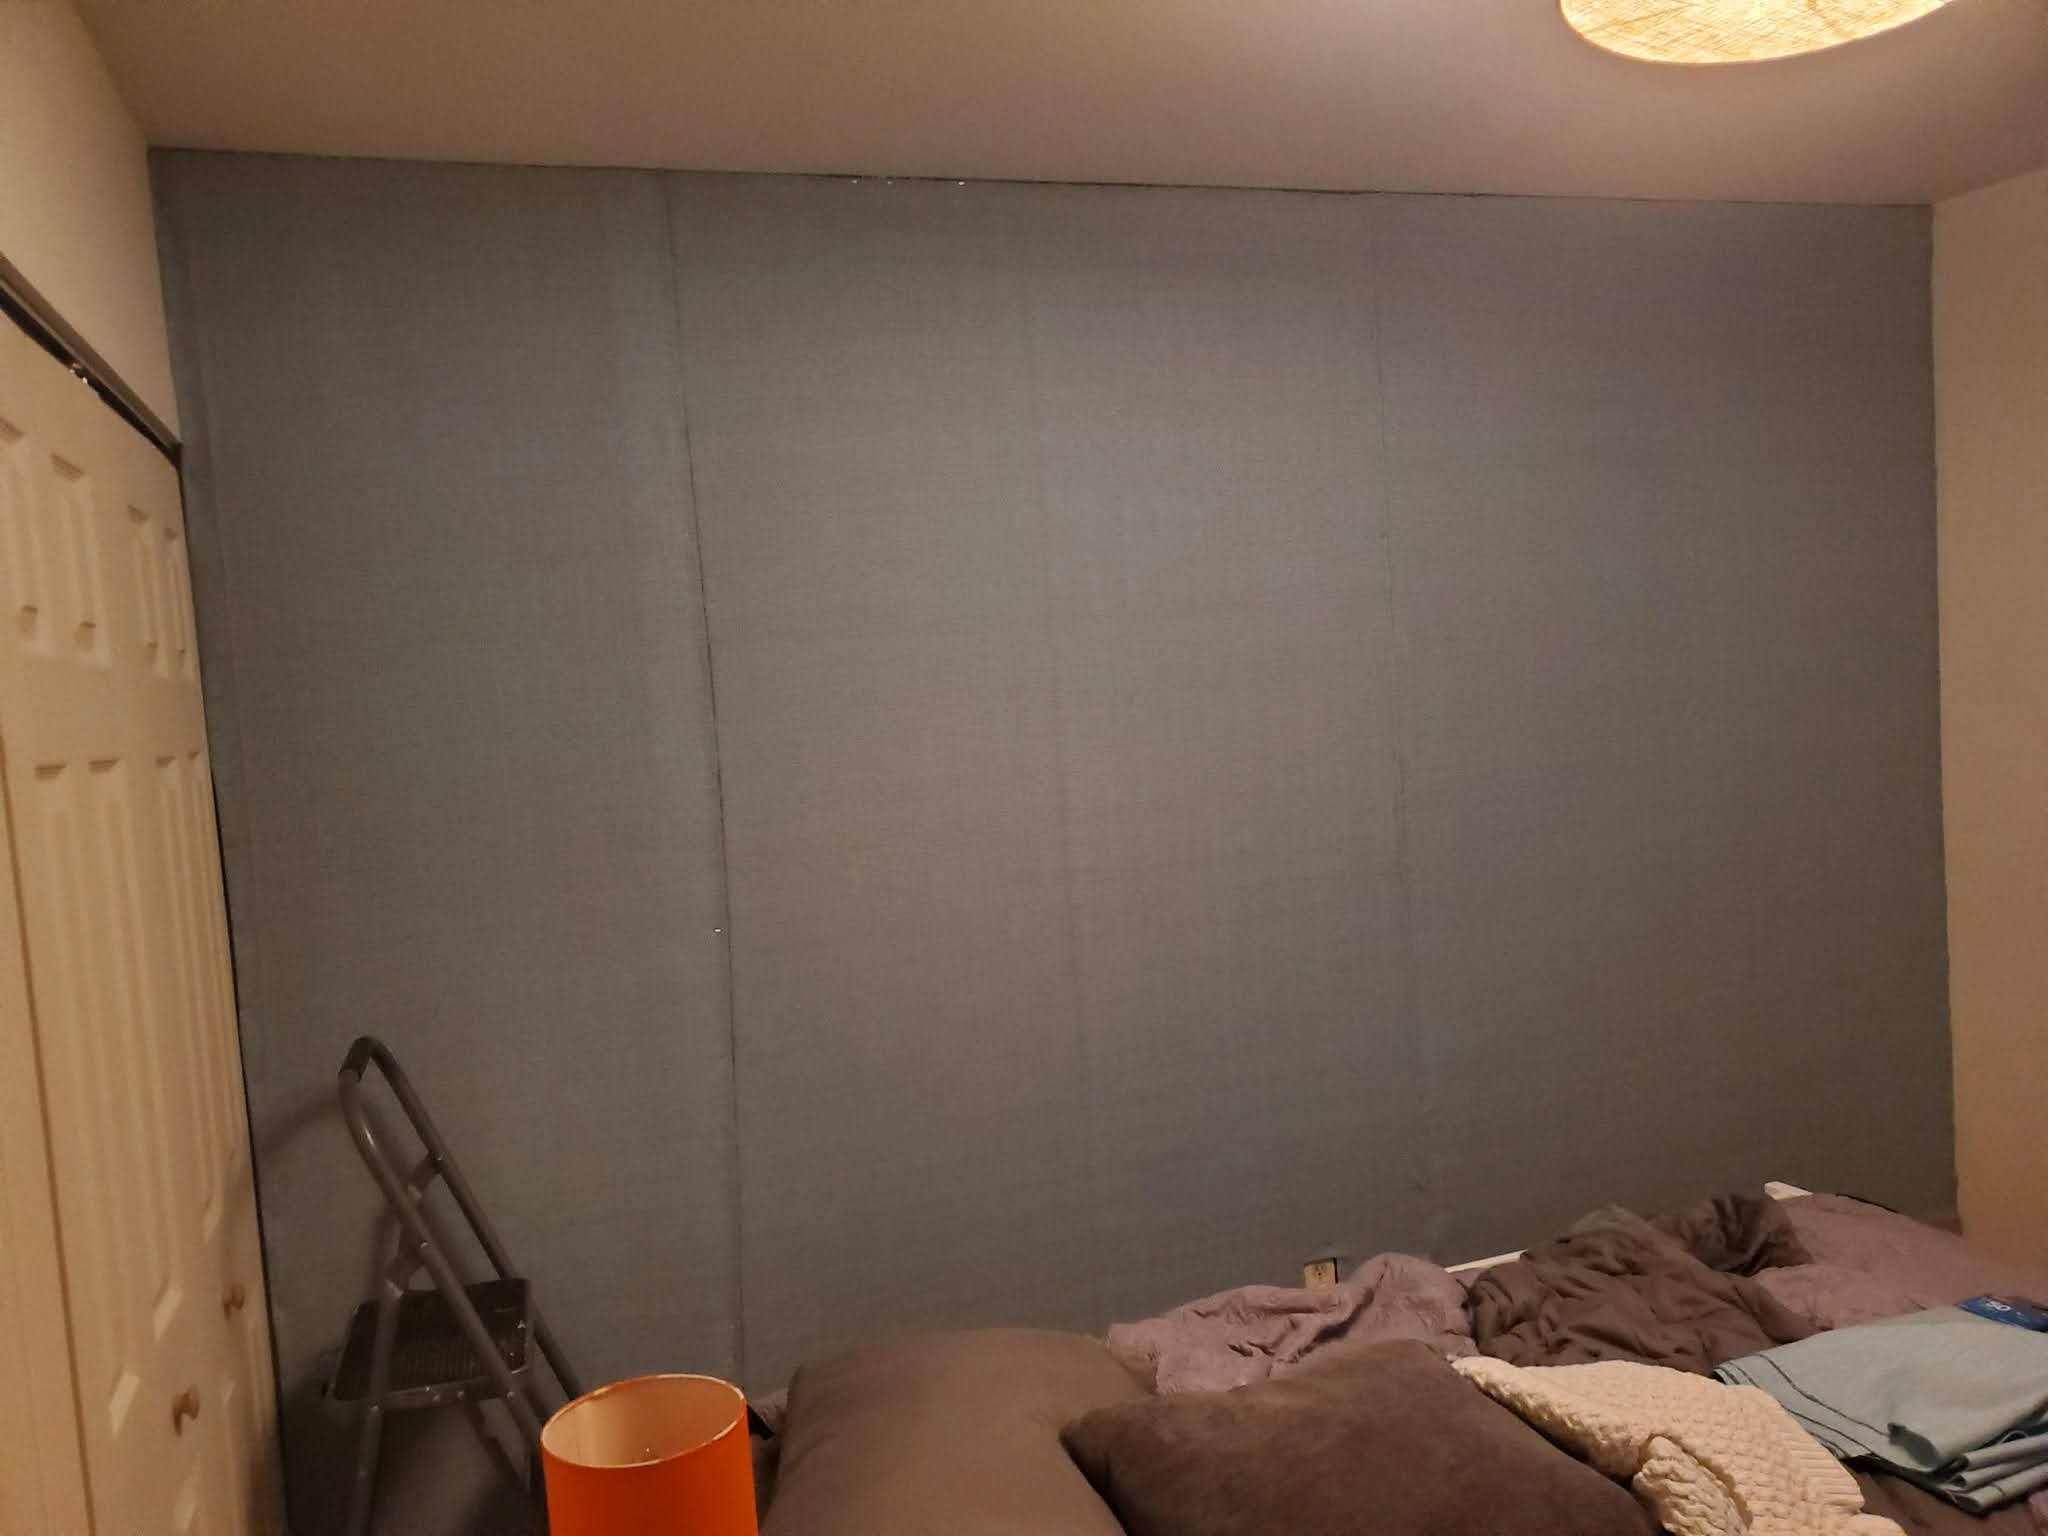
It really was one of the ugliest rooms in the listing, but it was a large enough room with great light and a large closet.  The rest was cosmetic.  I also thought the cork wall would be amenable to an easy wall treatment, peel and stick wall paper or fabric.


We had already set up the office space - our roommate needed a place to do his online fitness classes and Zoom meetings.  We used the refurbished wood desk with the faux marble top and I bought some simple accessories from Target for the room and put up some photos from my travels.


After some deliberation, we added this day bed from Overstock that pulls out into a king bed.  I really felt like our guests warrant a true bed instead of a couch fold out and this day bed really does the trick.  It has two twin mattress stacked on top of each other that you separate when you pull it out into a bed.  It also has two drawers and wooden slats as support - aka no metal bar hitting your back and hip all night.  It was time consuming to put together and I've had to go back and tighten it up with the drill, but it is fairly sturdy and comfortable and really does pull out to a true king.  It's a little low when you pull it out in the the king and the mattresses are a little firm. We'll be adding a topper to it soon in order to help with both of those issues.


I spent quite a bit of time on the ceiling light lampshade as noted in previous posts.  Unfortunately the fabric bottom part diffused the light a little too much and our roommate was having to turn on extra lights to be seen on Zoom classes and meetings.  I cut off the fabric but the edges looked too raggedy so I bought a new shade from HomeGoods.  They really do have great prices for these sort of things.  Well, actually first I bought this tiny crystal shade that was way too small and the in-laws got to hang out with it for the weekend while I bought a new large shade from Home Goods and mulled things over.  It's like @maximizingtiny says, measure before buying. As soon as they left, I went to Lowe's and got some chain links and then did some tweaking to get it up and level, with final touches from the hubs.

Most importantly, we covered up that horrible cork wall.  The roommate had gotten used to it as a Zoom background but I was still horrified.  I had ordered some peel and stick wallpaper - it didn't actually stick.  The corkboard consistency was just too irregular for it to stay in place and it looks bumpy and ugly.  This outdoor fabric was the perfect choice - strong, thick, and easy to staple in place.  See the blog post for more details on how we got it up.


So we have different configurations depending on if guests are in this room or not.  When the guests are here, the bed gets pulled out to the king size and the desk gets moved to the corner.


When there are no guests, the bed becomes a twin/daybed and the desk is centered on the wall. That way our roommate can do his online classes with the fabric wall backdrop and the lighting is almost perfect.


Oh yeah, and I've definitely shopped the house for this bedroom.  I'm using the custom entryway table from Etsy from the last house as a side table - the hubs requested something longer than the traditional side table given the bed's railing and dimensions and it works almost perfectly.  I am also using the medallion from the master bedroom from the last Baltimore house and the Silver Spring suburban house in this room - goes well on the wall alongside the windows and dresser, which was in the guest room closet at the Silver Spring house.  I am thinking about adding a large floor mirror instead of the small gold mirror from the previous house's entryway.  Only issue is where would it go when we have guests?  But that's not enough of a deterrent.  I saw a few at a home store the other day that were reasonably priced or it would be easy to DIY as well.


As you were...

-E

Monday, May 31, 2021

Fabric Wall

 Hi everyone!

We had a dash to the finish to complete the guest room for our holiday guests this past weekend!  One project that I had put off for too long - covering this ugly corkboard wall.


The listing photos really don't do the wall justice.  Its got a horrible texture, had random nails sticking out of it that were impossible to see, and the brown rubbed off on everything.  Just NO.

So I had some extra peel and stick wallpaper leftover from the bathroom and tested it on the cork wall.  For MONTHS.  It held up and seemed to cover the horrible texture.  So I went for it.

Option 1: A little thin, but a white background to go with the existing white walls, and a nice geometric gold line.  I LOVED it. 


Option 2:  A little thicker grass cloth looking option, but you already know I went with GOLD.


Installation was a little difficult but I went back to Young House Love's tutorial which is always helpful.  Unfortunately, the thin paper didn't go well with the textured cork walls and the debris left on the back of the sticky side didn't allow for multiple "restick" options. Sigh.

The thicker wallpaper had similar results.  I didn't even take a photo.


So I went to the option that I had been thinking about for multiple rentals but hadn't tried yet.  Something that wouldn't damage the walls.  Something that could cover heavy texture.  Something that I could easily remove and take with me upon departure.  Fabric.


I picked this teal outdoor fabric from Joann's that was on clearance at 50% off.  Enough to cover an 8 x 12 wall for right at $100.  That's less than half the price of all the peel and stick wallpaper, which I returned on my way home with the fabric.  YUP.  The key was picking an option that had enough fabric available to cover the wall.  And then having the store clerk double check my math.  He drew it out to confirm what I wanted and BAM, cut everything exactly right.  

Given the width of the fabric, I bought 3 panels about 8 ft high - I had included the baseboards in my measurement so I knew I'd have a few inches to play with. I folded over the top edge and used paperclips every few inches to keep it in place and straight.  Then I stapled it, using a staple gun) to the top of the wall.  Best part - the cork board was so forgiving, I could remove and reposition and push back in the staple wherever I needed.  SO MUCH BETTER THAN WALLPAPER.

 I knew I wouldn't need all of the 3rd panel and once I hung the top of the first two panels, I measured what I needed and cut a rough edge to remove the extra fabric.  Then I folded over that edge, but didn't need the paperclips down the side, and stapled again.  Also, I didn't wash, iron or starch the fabric.  The natural fold actually made it look like "panels" and corresponded to the halfway point on the panels, so I kept them.  I'm sure I could steam out the folds later if I wanted, but it looks fine to me.

In progress shots.


As we stapled the sides and bottoms of the panel, we pulled it taunt and smoothed it down.  That's how we found all the nails unfortunately.  The hubs had to help at the top and bottom - my hands weren't strong enough to use the staple gun with such a small amount of space remaining and my knees are dust.  I have also started to appreciate his perfectionist tendencies and have been calling him in at the end of projects to assess and give feedback before the finish.


Look look look!!!


Full reveal of the guest room coming soon!!!

-E

Tuesday, March 16, 2021

DIY Wooden Desktop


 Sup?


So...I took a little step away from bathrooms and went back to my roots.  A custom sized wooden desktop.


Remember this?  It's been over 5 years.  WOW.


This was one of my first big DIYs right after we bought the old Baltimore Rowhouse.  Custom sized with...whatever size they were when I bought them, sanded, stained, and connected together by a wood plank underneath.  I was so proud of these desktops.  Still am.  They're still in use in the office today.


So I was following this tutorial from @younghouselove for the den office space and almost bought an Ikea desktop.  But I just couldn't pull the trigger.  They weren't the right size/color/material - they just weren't right.  So...I kept looking.


And then I fell hard for this tutorial from @shadesofblueinteriors.  I loved how thick the desktop looked, how smooth and finished.  I was SOLD.


On to the build.

Quick trip to one of the home improvement store where I had them cut down the wood to my spaces measurements.  I think I had them cut down 6ft 1 inch thick planks to 65 inches.  I did want the desk to be wider so I had them cut one of the boards in half.  I left a little room to spare at the ends.  Here's the dry fit.


A perfect fit!  With a little room to spare!


So then I got to work attaching the half board to the whole board.  A lot of wood glue.  I didn't have large enough clamps so there was some paint can and heavy book positioning to hold things in place, which worked well...enough.


Wood filler


I then attached the trim, to make it look thicker and heavy visually.  More paint cans.


And voila!  Custom boards the exact width and length for the space.  SWEET.


And then I sanded.  Guys, I think I sanded all winter.  End of the day, 15 minutes of sanding before the sun went down and it got too dark and too cold.  30 minute stretches twice a day on weekends.  All. The.  Sanding.

Here are some mid sanding and after sanding pictures.


Yeah.  So I did that.  And then, I tried the stain that I had pre-tested. and promptly hated it.  So...back to sanding.  Please learn from me.  If you aren't in love with your pre-tested stain, keep working on finding one you like.


But finally, we got there.


And then we (I) realized that I hadn't measured for trim, so...these boards ended up in the basement office and the old original desktop from the first picture is holding up in the den office.  It's actually the perfect size for the den office while this desktop is the perfect size for the basement office.  Serendipity from stupidity, I guess.


So this space is almost done.  I have to paint the remaining cabinet white and add legs to get it to be the right height.  I also just put in a request to paint PART of the basement paneling to my landlords.  Fingers crossed.  Can't hurt to ask, right?


Night!

E